Table of Contents
In the upcoming blog post, we'll be discussing how to integrate WebSockets into full-stack apps using Dart!
We've covered full-stack apps with Dart in the past using Dart Frog and gRPC, and we hope you've been following along. In those scenarios, we made the most of REST APIs and gRPC, but we're now exploring how WebSockets can take things to the next level with real-time updates! Get ready to dive in!
WebSockets
Let's start by exploring what WebSockets are and how they can be helpful.
WebSocket is a protocol, similar to HTTP, but with a crucial difference - it is bidirectional, meaning it keeps the connection between the client and server open. This allows us to push changes to the client whenever necessary, as opposed to using HTTPS, where the client needs to request updates, resulting in inefficiency as the updates may not be in real-time. This can result in unnecessary requests, especially if we're using a polling strategy.
WebSockets are particularly useful in situations where immediate communication with clients is necessary. Examples include chat applications, trading apps, and games. On the other hand, if we only need to consume static data that won't change, we may use HTTP with a traditional REST API.
Creating our WebSocket server using Shelf
Awesome! Now that we have a clear understanding of what WebSockets are, let's dive into some coding and build a server that supports this functionality.
In our previous example, we built an app that retrieved users from a REST API using Dart Frog. We will build on that example and add WebSocket communication so that any changes to our users are immediately reflected in our app. While this may not be the most complex example, it's simple enough to help us understand how everything works under the hood. You can find the full working example on GitHub.
The first step is to create our server and change the client communication. For our first example, we will use Shelf. If you are not familiar with Shelf, it is a minimalist web server library for Dart. As per their documentation, we have that:
“Shelf makes it easy to create and compose web servers and parts of web servers”
In essence, even though Shelf is not a full-fledged server framework like Serverpod for Dart or Django for Python, it allows us to compose web servers in a modular way. To demonstrate a complete WebSocket example, we will be using shelf-web-socket in our project. This is because when working with Shelf, we only have access to the core, and then we can add as many Shelf-related packages as needed.
Let's start by creating a folder called shelf-server and using one of Dart's templates. As you may recall, when we use the dart create command, we have access to different templates.

So if we run the command:
We will see our basic structure in place.
Let's analyze it:
The structure of the generated project should look familiar to those who have worked with a Dart package before, with a few minor differences. In addition to our regular files, we have a server.dart file inside our bin folder. This is where all the magic happens. The template already includes the Shelf and shelf-router dependencies, which provide routing capabilities.
As mentioned earlier, we need an additional dependency to enable WebSockets in our project. Let's add it quickly:
Now that we have everything in place, let's replace our server.dart with the following implementation:
Here we have a few things happening:
- Created a Router to define the endpoint we will use, which in this case is /api/v1/users/ws.
- Created our WebSocket handler, _wsHandler, which listens for incoming messages and responds with an echo.
- Hooked everything up in a Pipeline and start our server to listen on port 8080.
Let's start our server and verify everything is up and running:
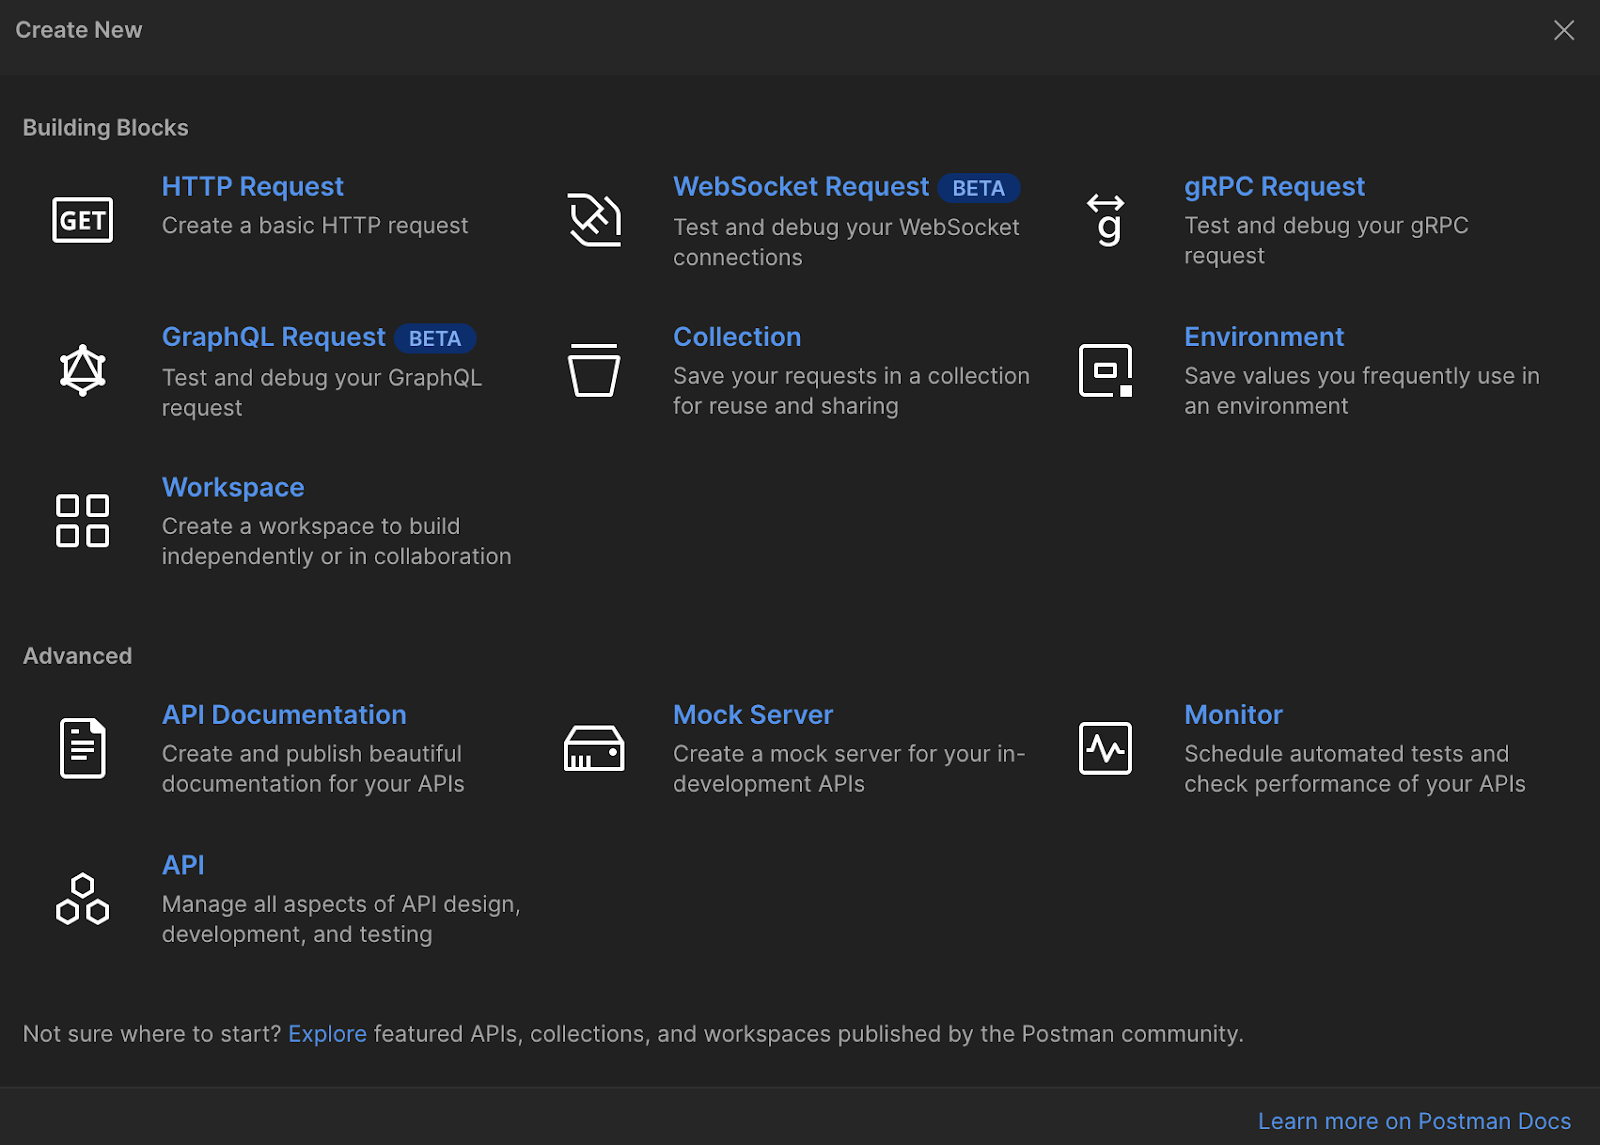
After starting the server, you should receive a message indicating that the server is listening on port 8080. To test if the server is working properly, we can use Postman, which also provides a tool for testing WebSockets. To do so, open Postman and click on the New button to create a new WebSocket request.
Then we need to put the correct URL, in this case it will be ws://localhost:8080/api/v1/users/ws.
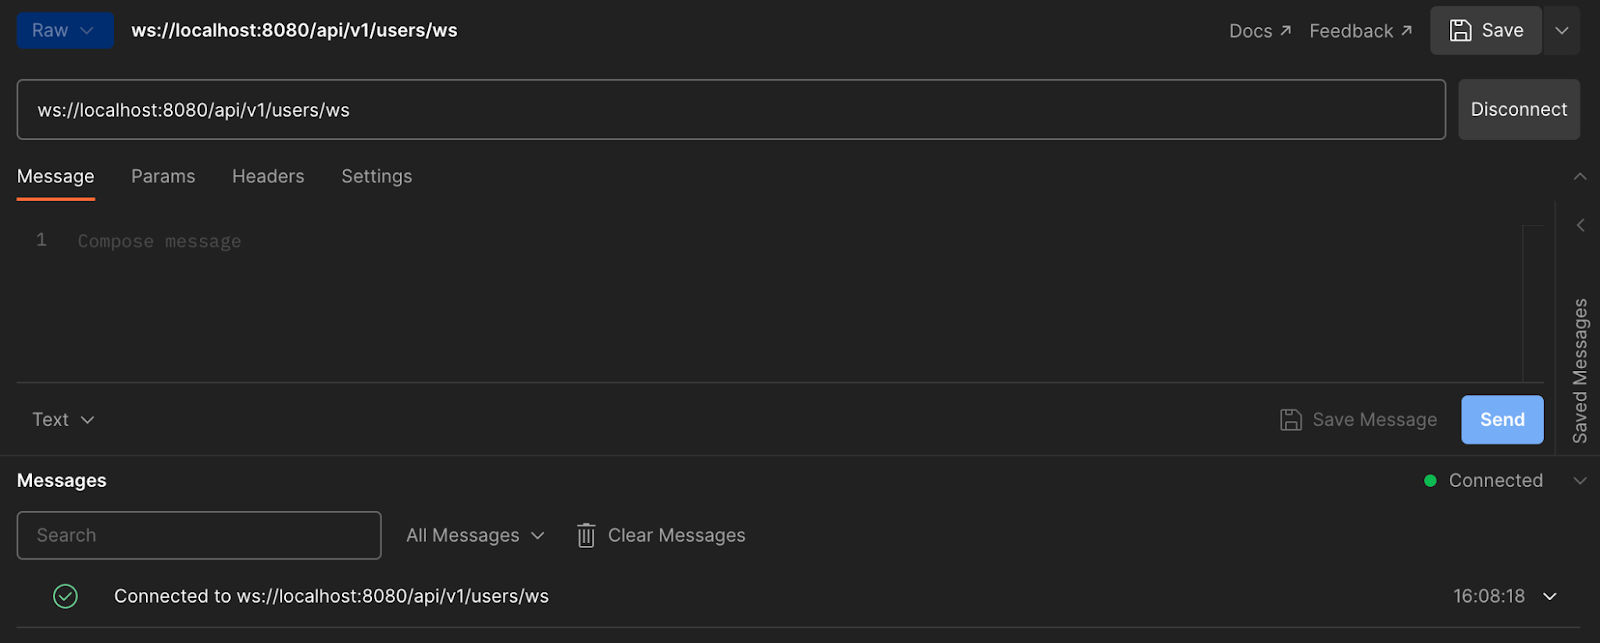
Great! You should see a message in Postman saying the connection was established. Let's also send a message and verify that our echo endpoint is working as expected:
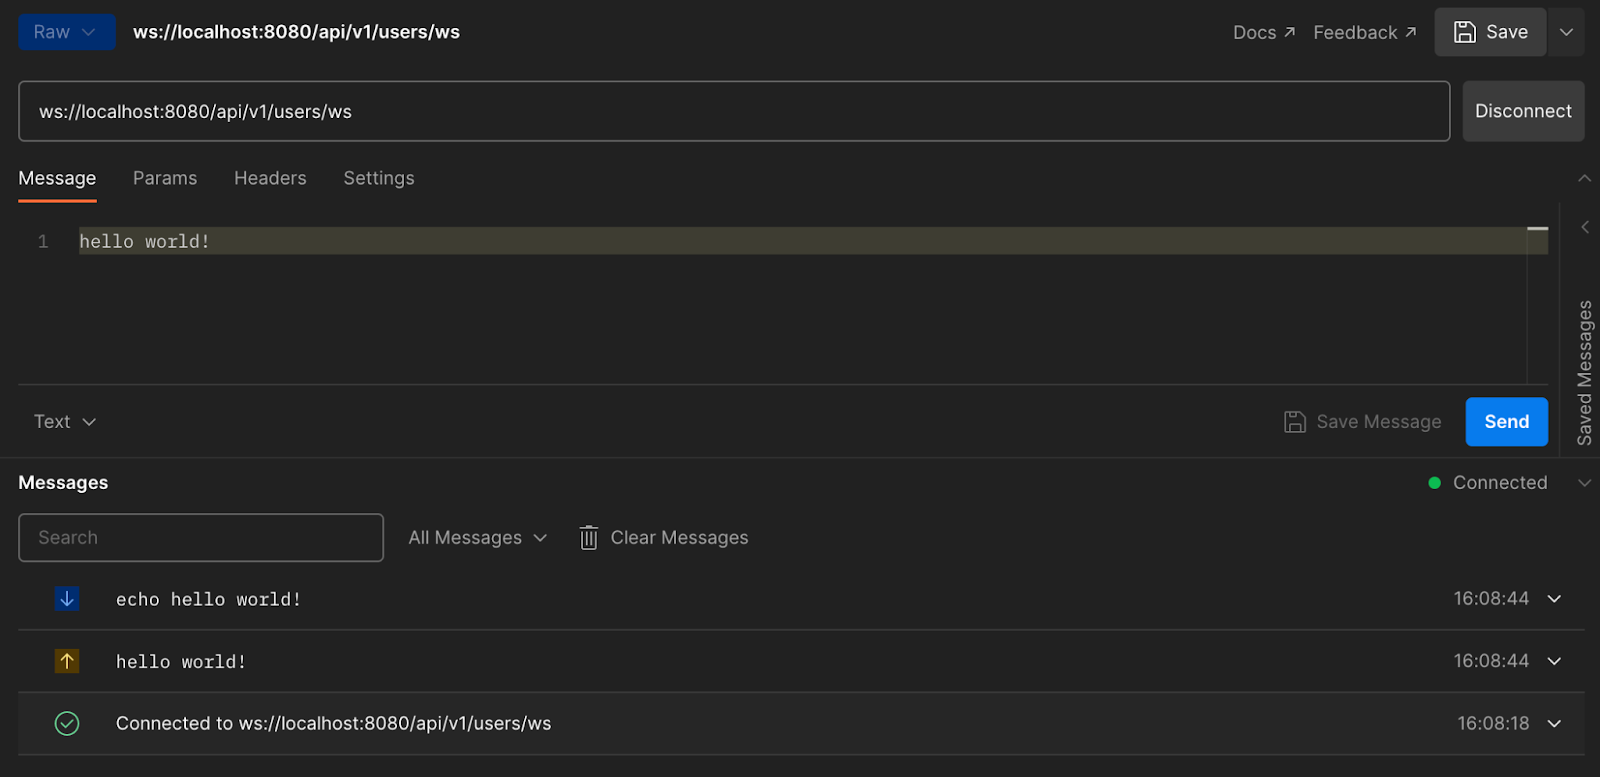
Perfect, now Postman is saying we sent the message hello world! and also sent a response back saying echo hello world!. With this, we wrapped up the first part of our blog!
So, let's recap what we did so far:
- We saw what is the WebSocket protocol.
- What is Shelf and how we can create a server.
- Tested our server using Postman as our client.
Creating our WebSocket server using Dart Frog
So far, everything seems good, but as you may have noticed, there is a lot of boilerplate code required to implement our server example. Additionally, we still haven't completed the task of responding with our list of users. To simplify the process, we're going to explore another option that is similar to Shelf and demonstrates how to add WebSockets to our app.
As we mentioned earlier, we've previously used Dart Frog, which is a high-level abstraction on top of Shelf. In the same way as Shelf, we need to install an extra dependency called dart_frog_web_socket.
After adding this dependency, we only need to add a single file called ws to our existing routes structure. If you recall, our previous structure looked like this:
So, inside our users folder, let's add the file ws.dart with the following code:
Let's see what we are doing here:
- First, we initialize a list of hardcoded users, so we can return something and also add a new user.
- Then, we define a list of clients of type WebSocketChannel. This list will contain every client that is connected. Remember that connections will stay open until the client decides to end it. If we want to communicate updates, we might save the clients in an array for later use.
- Next, we define our onRequest method just like our rest endpoints. The difference will be that here we are using a webSocketHandler instead.
- Inside the webSocketHandler, we can add our client, send the actual state (the current list in JSON format), and finally listen for incoming messages.
- If a message arrives (in this case any message), we assume someone wants to add a user, so we randomly add one to the list, and of course, communicate that change to all connected clients.
- Finally, when the connection is terminated (the onDone parameter), we remove our client from the list as we don't need to continue sending messages to it.
And that's it! Writing everything in Dart Frog is a bit less complicated, as it takes care of a lot of the initial boilerplate for us. Let's see how we can connect our Flutter app to work with this implementation!
Creating our WebSocket client in our Flutter app
The good part about our current architecture is that we don't have to make a lot of changes. We only need to:
- Update our UsersRepository so it can support a method that streams a list of users.
- Update our UsersBloc so we can listen for changes in the UsersRepository and update our state whenever the repository send the updates.
- Initialize our UsersRepository in our main.dart because naturally it will require other dependencies.
Notice that is not necessary to change anything in the UI as it was listening for changes in the BLoC already.
Let's start by changing our UsersRepository. We need to add a WebSocketChannel and create a method users for getting our users and convert them into a List<User>:
Then, we have to update our UsersBloc and add a StreamSubscription that will listen for any changes in the users:
Finally, let's not forget about initializing our WebSocketChannel and pass it to our UsersRepository:
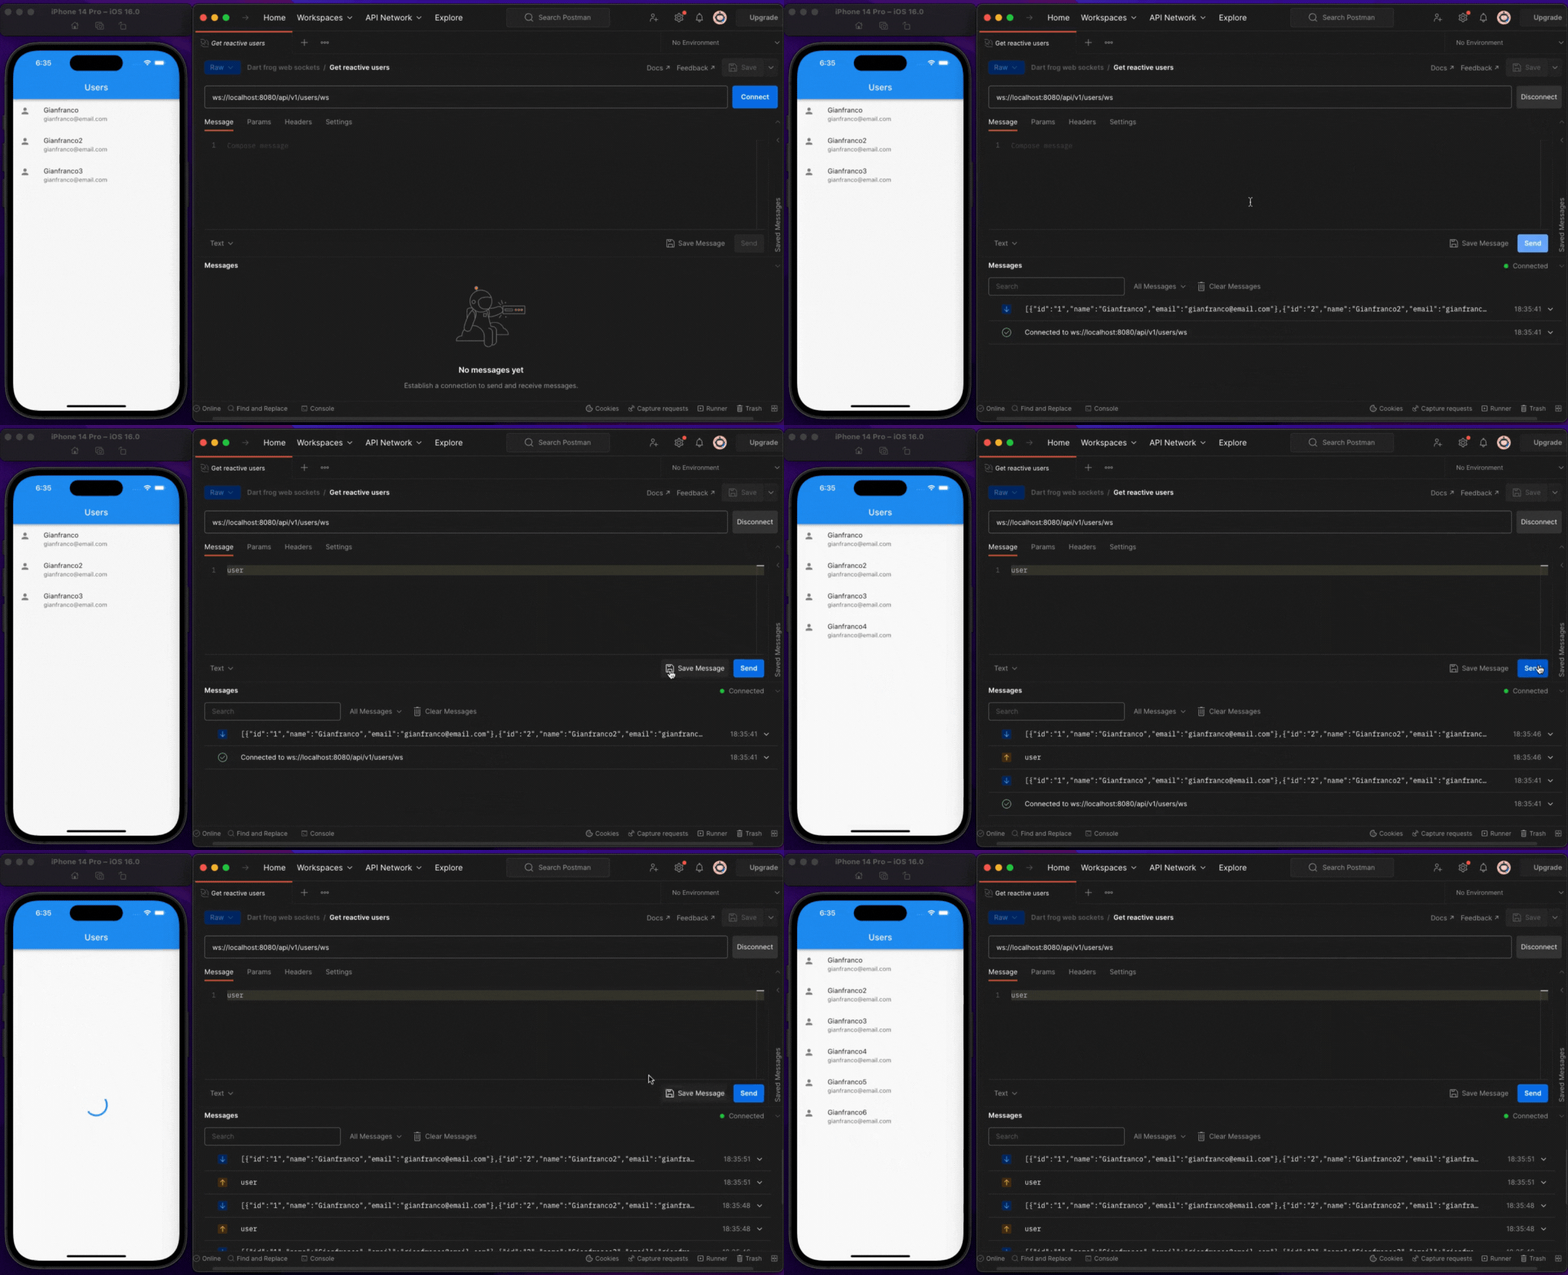
We now can use WebSockets to consume the endpoints in our Dart Frog server. If you run the project, you should see the users updating whenever we send a message to our server.
Bonus: adding BroadcastBloc to our Dart Frog server
As a bonus, we will introduce a way to reduce the amount of boilerplate code needed in our Dart Frog server for handling WebSockets logic. Often, this involves saving a list of clients and sending them updates whenever there are changes in our state.
To achieve this, we will use the broadcast_bloc library. Our approach will be to create a BLoC in our server that saves the list of users in its state. Yes, we are using BLoC on the server!
The basic implementation of our UsersBloc defines a single method that handles the UserCreated event called _onUserCreated. This method adds a random user to our state.
And here you can see the beauty of the library as we really only have to subscribe our new client to the BLoC and then, whenever we receive a message, we just add an event to the BLoC, as usual. The BLoC itself will be in charge of communicating that change across all connected clients.
Keeping state in our server
In our previous example, we learned how to use WebSockets to share a list of users among multiple devices. However, when dealing with server-side state, things can get more complex, especially when deploying our server on platforms like Cloud Run.
Cloud Run scales up and down our server based on traffic, and multiple instances of our server can have multiple clients connected to each instance. If a client adds a user to one instance, only the users connected to that instance will react to that change. Therefore, we need to be cautious when working with WebSockets, as these connections are intended to be kept alive in the server for as long as necessary.
There are solutions to this problem, but we won't be covering them in this article. If you're curious, you can search for how to use Pub/Sub with Redis to communicate changes across different instances of our servers. A really cool demo of this can be found in this video.
Final thoughts
In a nutshell, working with WebSockets is actually super fun and easy once you get the hang of it. You'll find several methods available, like Shelf and Dart Frog, and many more! We're hopeful that this blog post has given you plenty of resources to start using WebSockets like a pro.
But remember, it's crucial to use this protocol only when it's the right fit for your Flutter application.
And that's a wrap! We've reached the end of our journey exploring full-stack applications using Dart, where we covered in other blog posts the use of Dart Frog and gRPC for building the backend of a Flutter application.
But we're not done yet. We'd love to hear from you in the comments section about what else you'd like us to explore next.


.png)


.png)
.png)